DocsGetting started
Getting started
Sign up, create your company workspace, add your first employee, and complete the first payroll preparation run.
This guide walks the full first-run path: creating the owner account, setting up the company workspace, adding staff, collecting approvals, and preparing the first payroll draft. It is the same path used for MVP acceptance and first-run onboarding.
In the app, staff are represented as employee records. Payroll completion means preparing a draft, clearing critical blockers, and locking the payroll draft for export. It does not mean statutory payroll calculation is fully automated.
Fast path
| Stage | Primary screen | Outcome |
|---|---|---|
| Create account | /sign-up | Owner account is created and can continue to onboarding. |
| Create workspace | /onboarding | Company workspace exists and is scoped to the owner. |
| Confirm setup | /setup and /setup/company | Company profile, departments, leave, claims, and payroll cycle defaults are ready. |
| Add staff | /employees/new | At least one staff record has employee and payroll fields. |
| Submit inputs | /leave and /claims | Leave and reimbursement items enter the approval workflow. |
| Approve items | /approvals | Pending leave and claims are decided with guardrails. |
| Prepare payroll | /payroll | Draft is generated, blockers are reviewed, and lock is completed when clear. |
Before you start
- Have the owner name, email, and password ready.
- Prepare the company name, registration details if available, country, currency, timezone, and address.
- Prepare starter departments, branches, leave types, claim categories, and the first payroll cycle dates.
- Prepare at least one staff member with employee code, legal name, email, phone, start date, emergency contact, salary, bank, EPF, SOCSO, and tax details.
- For the approval walkthrough, prepare one leave example and one claim receipt example.
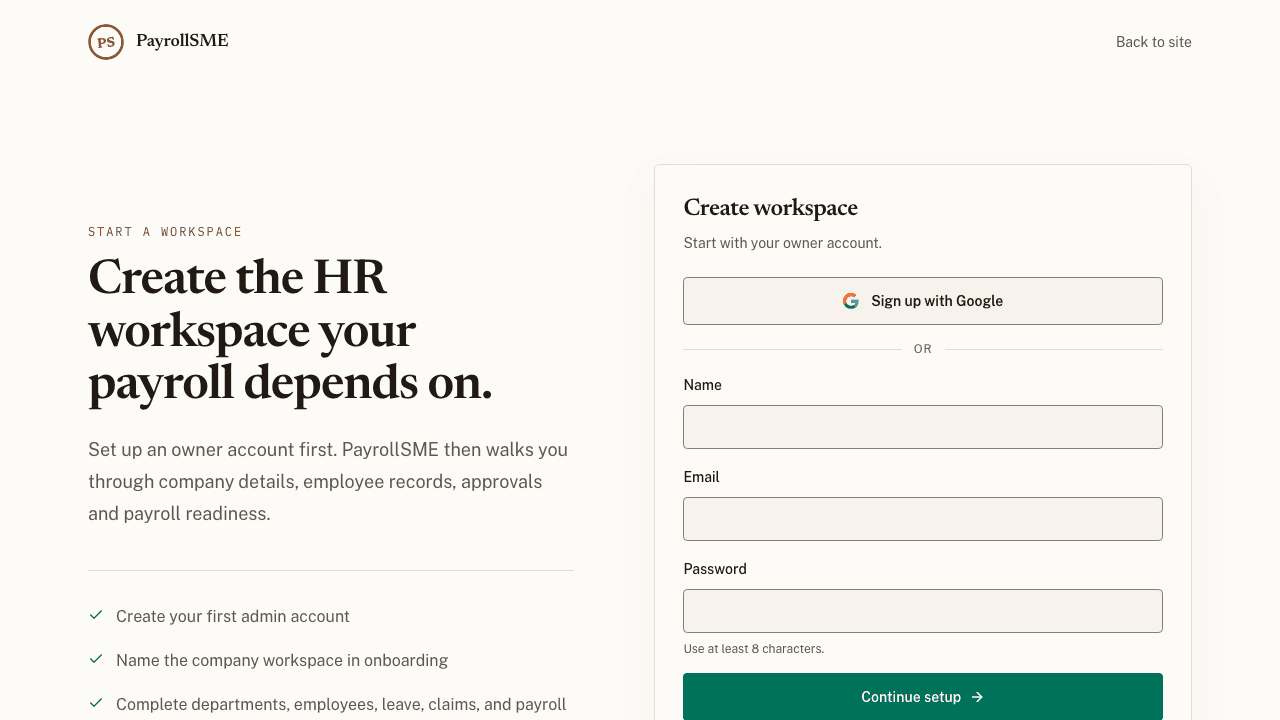
1. Create the owner account
Screen: /sign-up · Goal: start the owner account that will control the first workspace.
- Open PayrollSME and choose Create workspace, or go directly to
/sign-up. - Enter the owner name, work email, and a password with at least 8 characters.
- Select Continue setup.
Acceptance check
- The owner account is created, or the form shows a clear validation error.
- The next screen is onboarding, unless the account already has a workspace.
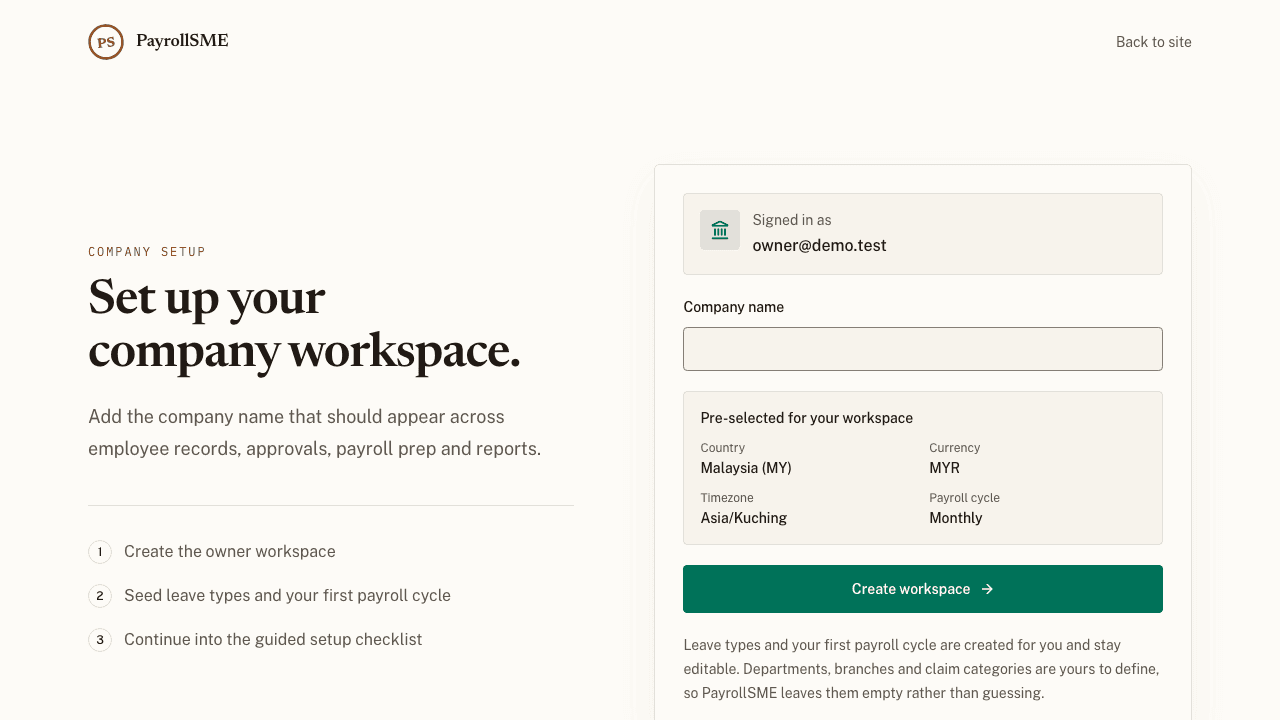
2. Create the company workspace
Screen: /onboarding · Goal: bind the signed-in owner to a company workspace.
- Enter the company name that should appear across employee records, approvals, payroll prep, and reports.
- Review the pre-selected workspace defaults — country (Malaysia), currency (MYR), timezone (Asia/Kuching), and monthly payroll — shown below the form. All of them stay editable later in setup.
- Select Create workspace.
- The workspace opens straight into the setup wizard at
/setup; the first-run landing no longer goes through the dashboard.
Acceptance check
- The workspace is created under the signed-in owner.
- The app moves from public/auth pages into the protected workspace.
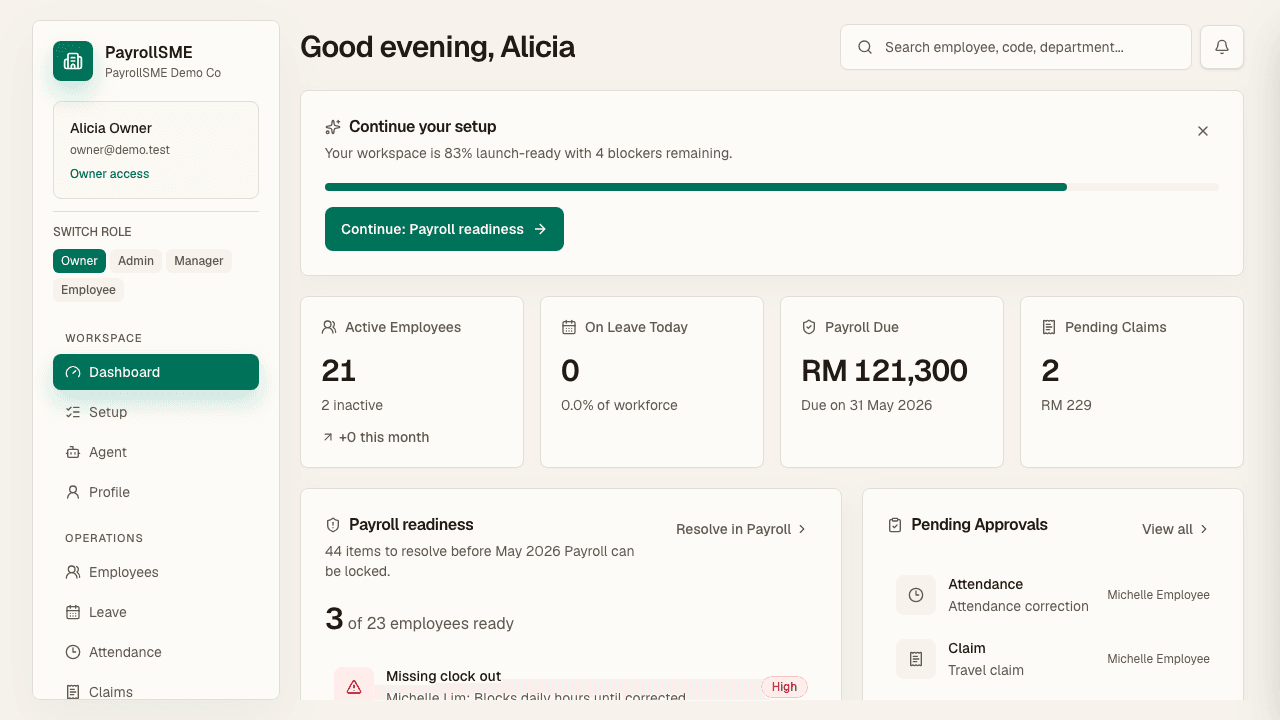
3. Read the first dashboard
Screen: /dashboard · Goal: understand where the workspace stands and what to do next.
- Review the KPI row: active employees, on-leave staff, payroll due, and pending claims.
- If setup is still incomplete, the Continue your setup card shows the launch readiness score, the blocker count, and the next step. It links back into the wizard — the dashboard no longer keeps a second, separate setup checklist.
- Review approvals, attendance, and the leave calendar before moving on.
Acceptance check
- A fresh tenant should not look like it has fake activity.
- The setup card should point the owner back to the wizard and its next step.
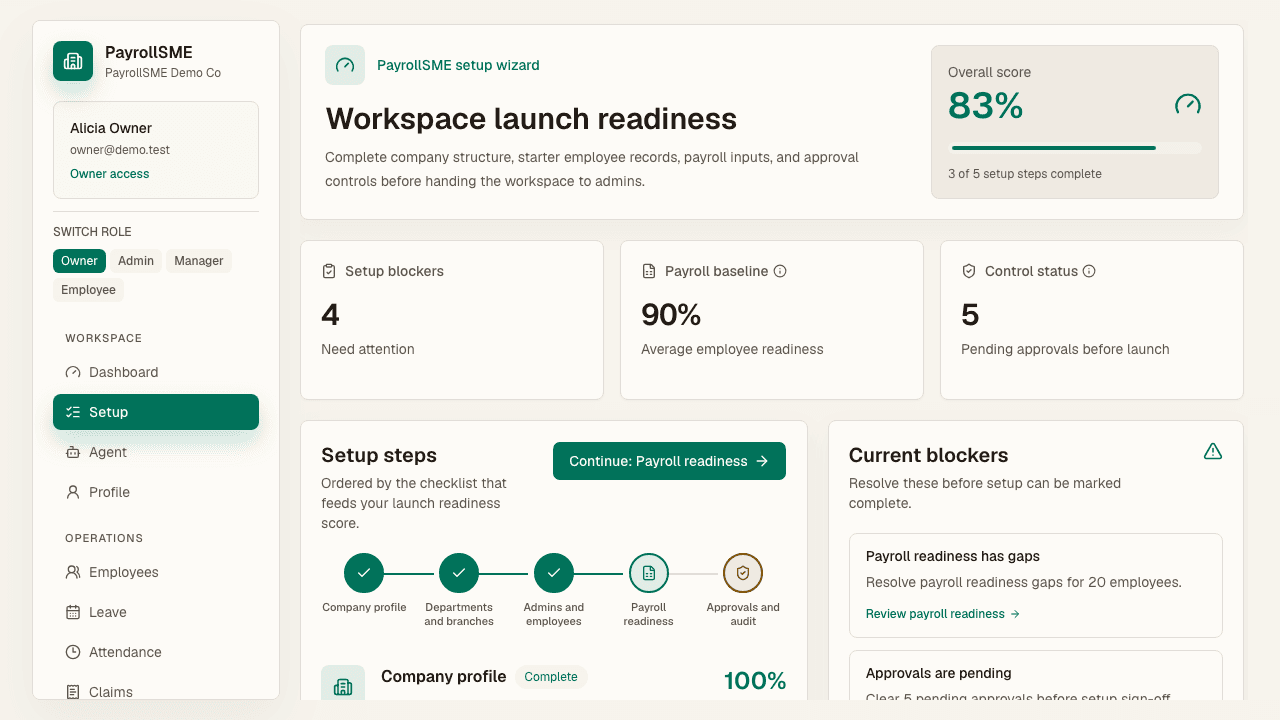
4. Follow the setup checklist
Screen: /setup · Goal: know what must be finished before the workspace is launch-ready.
- Open Setup from the sidebar.
- Review the overall score, setup blockers, payroll baseline, and control status.
- Use the five-step stepper, Continue, or the blocker links to work through company profile, teams, first employees, payroll readiness, and approval/audit controls. Completed steps show a check, the next step is highlighted, and blocked steps stay visible.
Acceptance check
- Each blocker points to the screen where it can be resolved.
- The setup score increases as company data and staff records are completed.
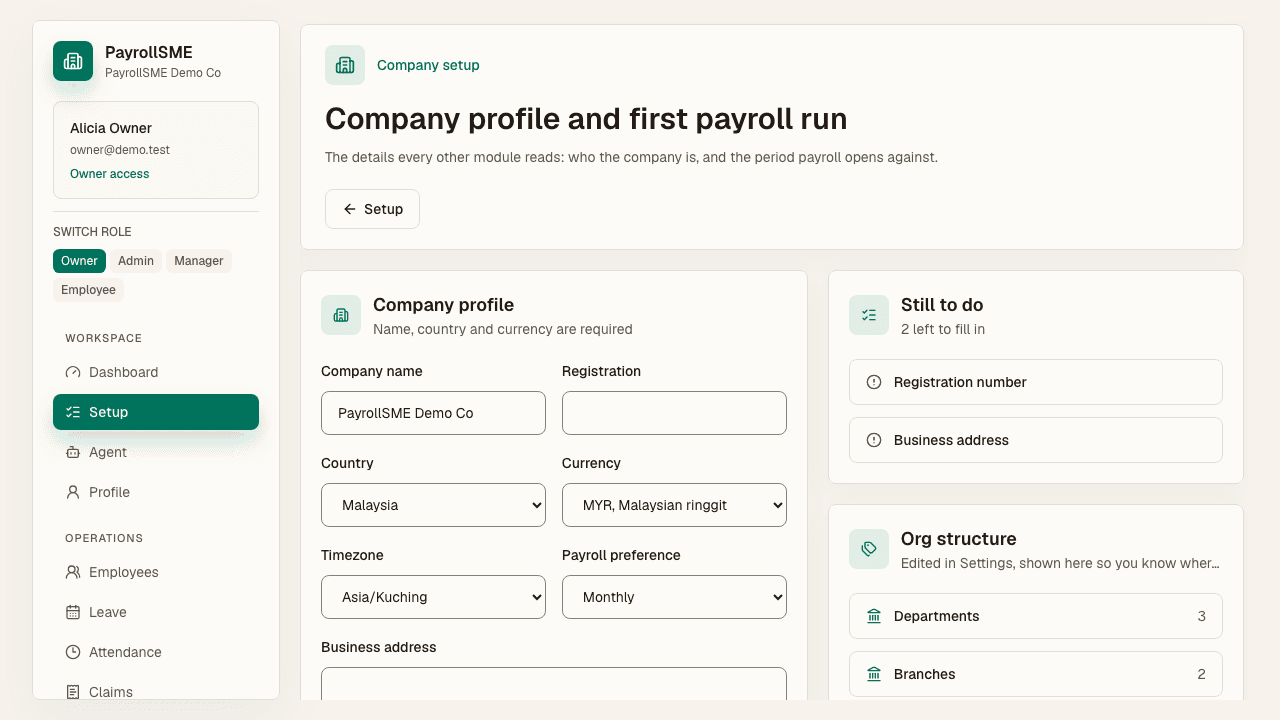
5. Confirm company and payroll defaults
Screen: /setup/company · Goal: seed the defaults used by leave, claims, and payroll readiness.
- Confirm company profile basics: name, country, currency, timezone, payroll preference, and address.
- Confirm the open payroll cycle name, period start, and period end.
- Check the org structure counts for departments, branches, leave types, and claim categories. These are managed with per-row editing on
/settings#organization, and this page links there when something is missing. - Select Save company profile. The payroll cycle is rejected with a clear message if its period end is not after its period start.
Acceptance check
- Setup health shows departments, branches, leave types, claim categories, and payroll cycles as present.
- The first payroll cycle is open and ready for a draft.
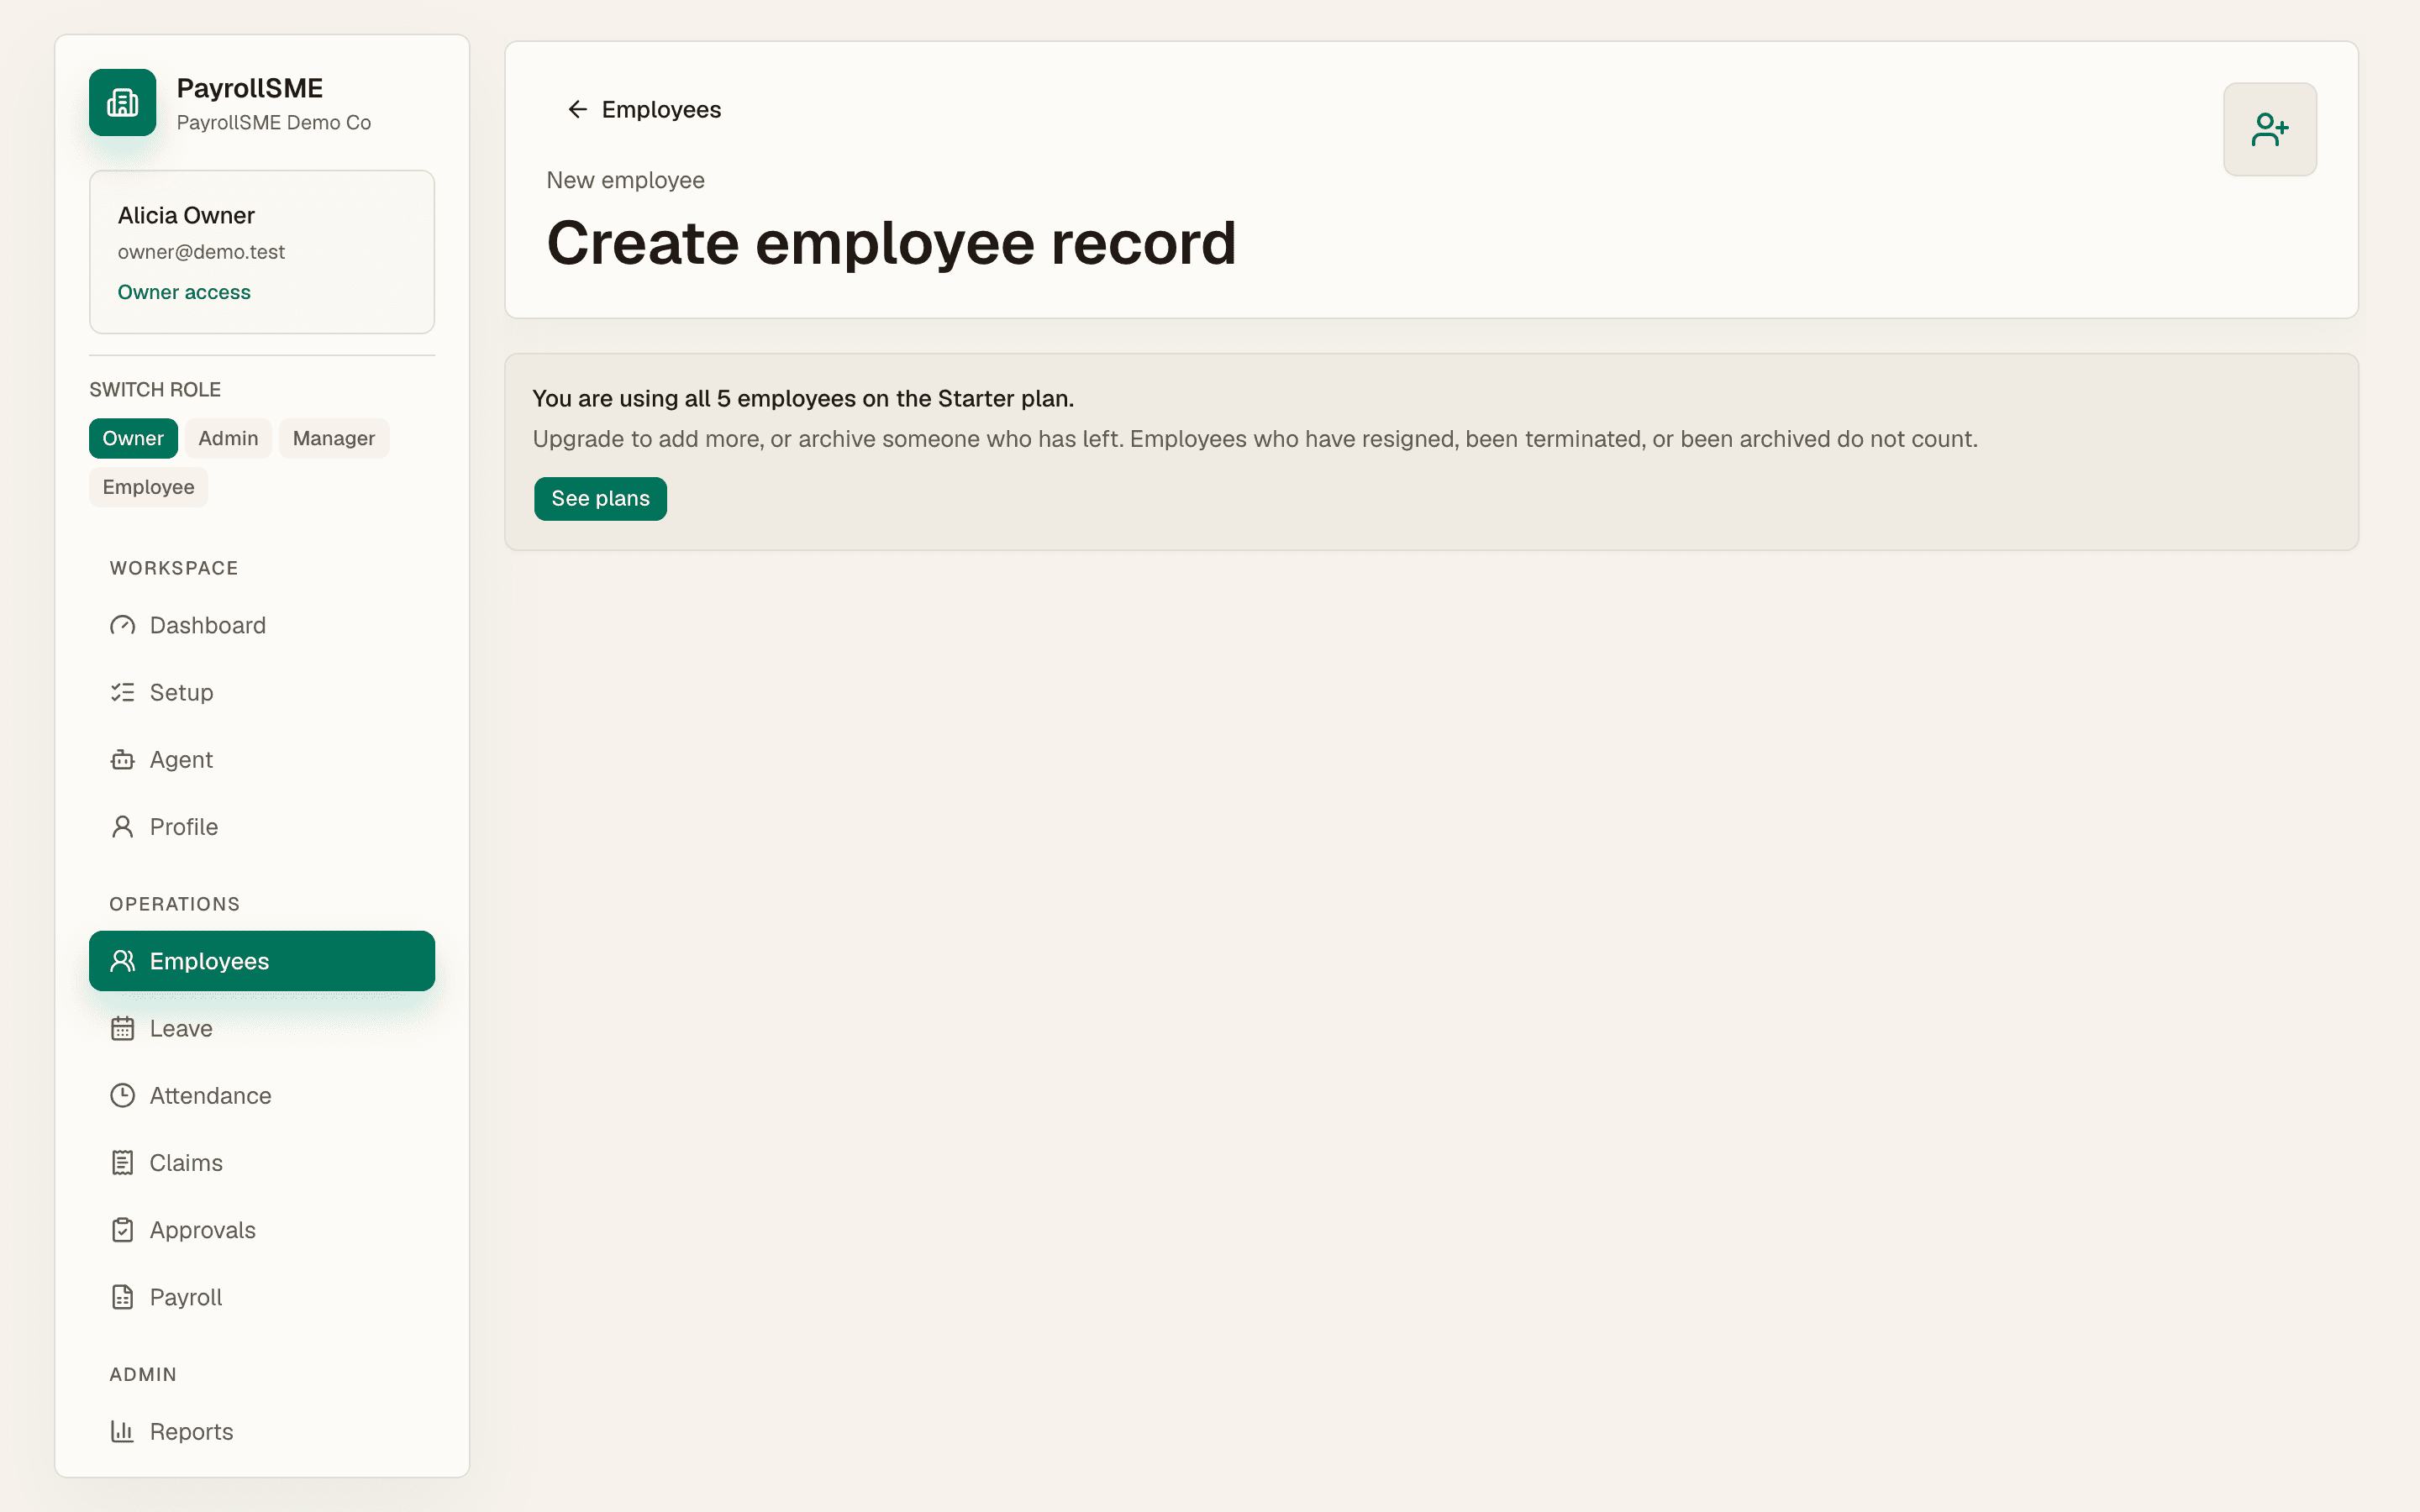
6. Create the first staff record
Screen: /employees/new · Goal: add an employee record with payroll-ready basics.
- Open Employees, then select New employee.
- Complete profile basics: employee code, legal name, preferred name, work email, phone, start date, job title, emergency contact, emergency phone, employment status, and employment type.
- Complete starting salary: pay type, effective date, amount, currency, bank, bank account last four digits, EPF number, SOCSO number, and tax number.
- Select Save employee.
Acceptance check
- The employee appears on
/employeesafter saving. - Payroll readiness improves only when required employee and salary fields are present.
7. Submit a leave item for approval
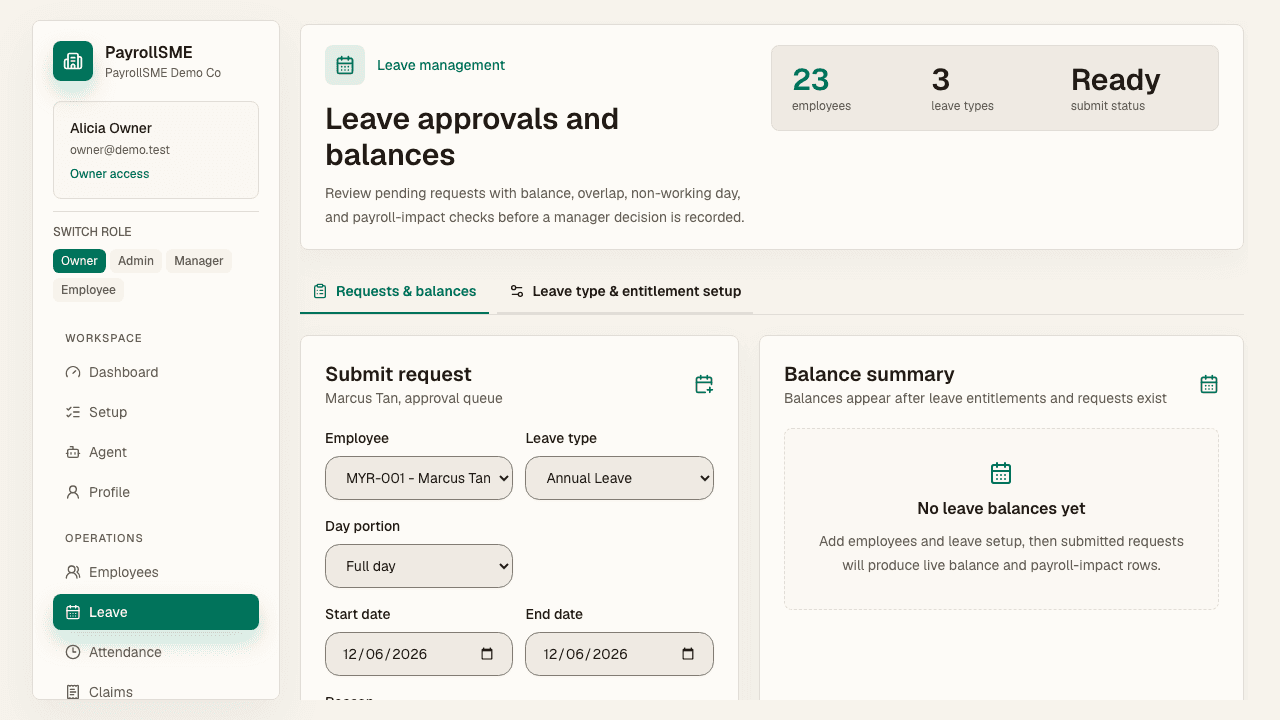
Screen: /leave · Goal: create a leave request that can affect payroll readiness after approval.
- Open Leave from the sidebar.
- Select the staff member and leave type.
- Enter start date, end date, day portion, and reason.
- Select Submit request.
- Use the Review in approvals link, or open Approvals from the sidebar.
Acceptance check
- A submitted request appears in the approval workflow.
- Payroll-impacting leave does not mutate payroll until approved.
8. Submit a claim receipt
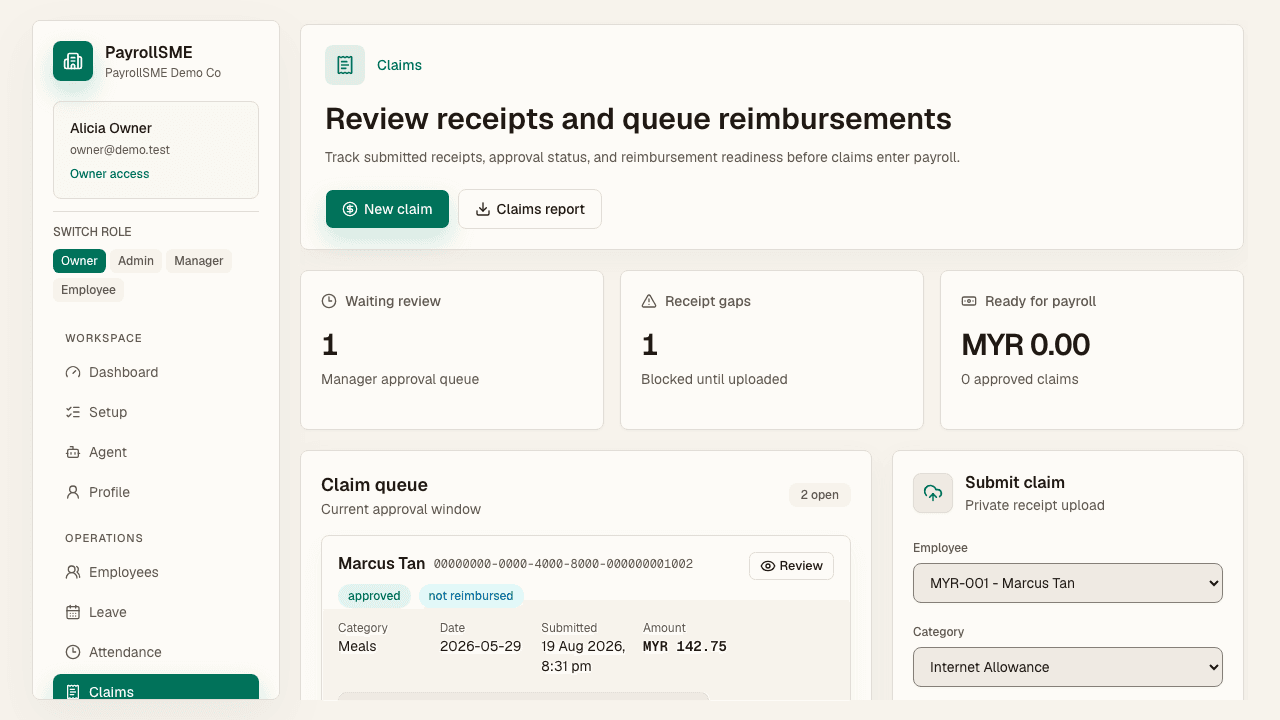
Screen: /claims · Goal: create a reimbursement item that can be included in payroll after approval.
- Open Claims from the sidebar.
- Select the staff member and claim category.
- Enter amount, currency, claim date, and notes.
- Attach a receipt image or PDF when required.
- Select Submit claim.
Acceptance check
- The claim enters the claim queue and approval inbox.
- Claims without a required receipt or approval stay blocked from payroll reimbursement.
9. Approve or reject pending items
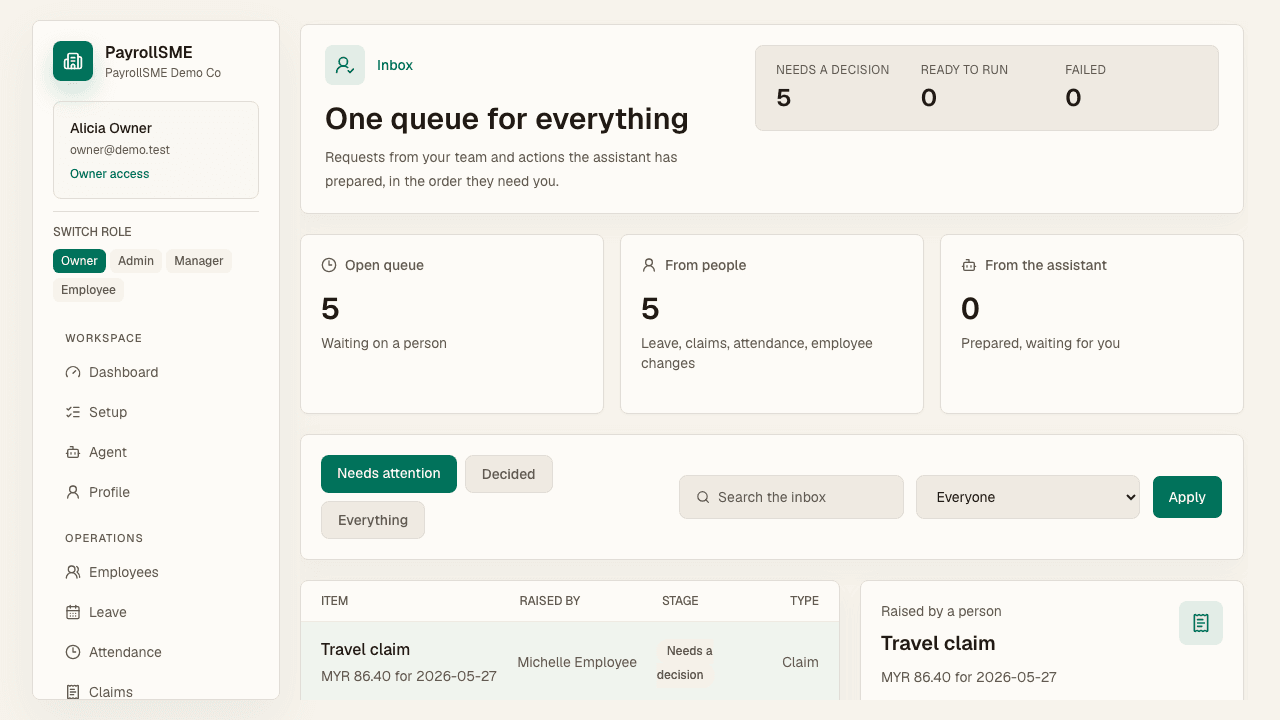
Screen: /approvals · Goal: clear approval blockers before payroll lock.
- Open Approvals from the sidebar.
- Use status, type, and search filters to find the leave request or claim.
- Select the request row to review requester, approver, submitted date, due date, risk signals, and detail rows.
- Choose Approve, Reject, or Request changes. Rejections and change requests should include a clear decision note where prompted.
Acceptance check
- Pending leave and claim items are decided before payroll lock.
- Decision guards prevent invalid actions such as deciding closed items.
10. Generate and lock the payroll draft
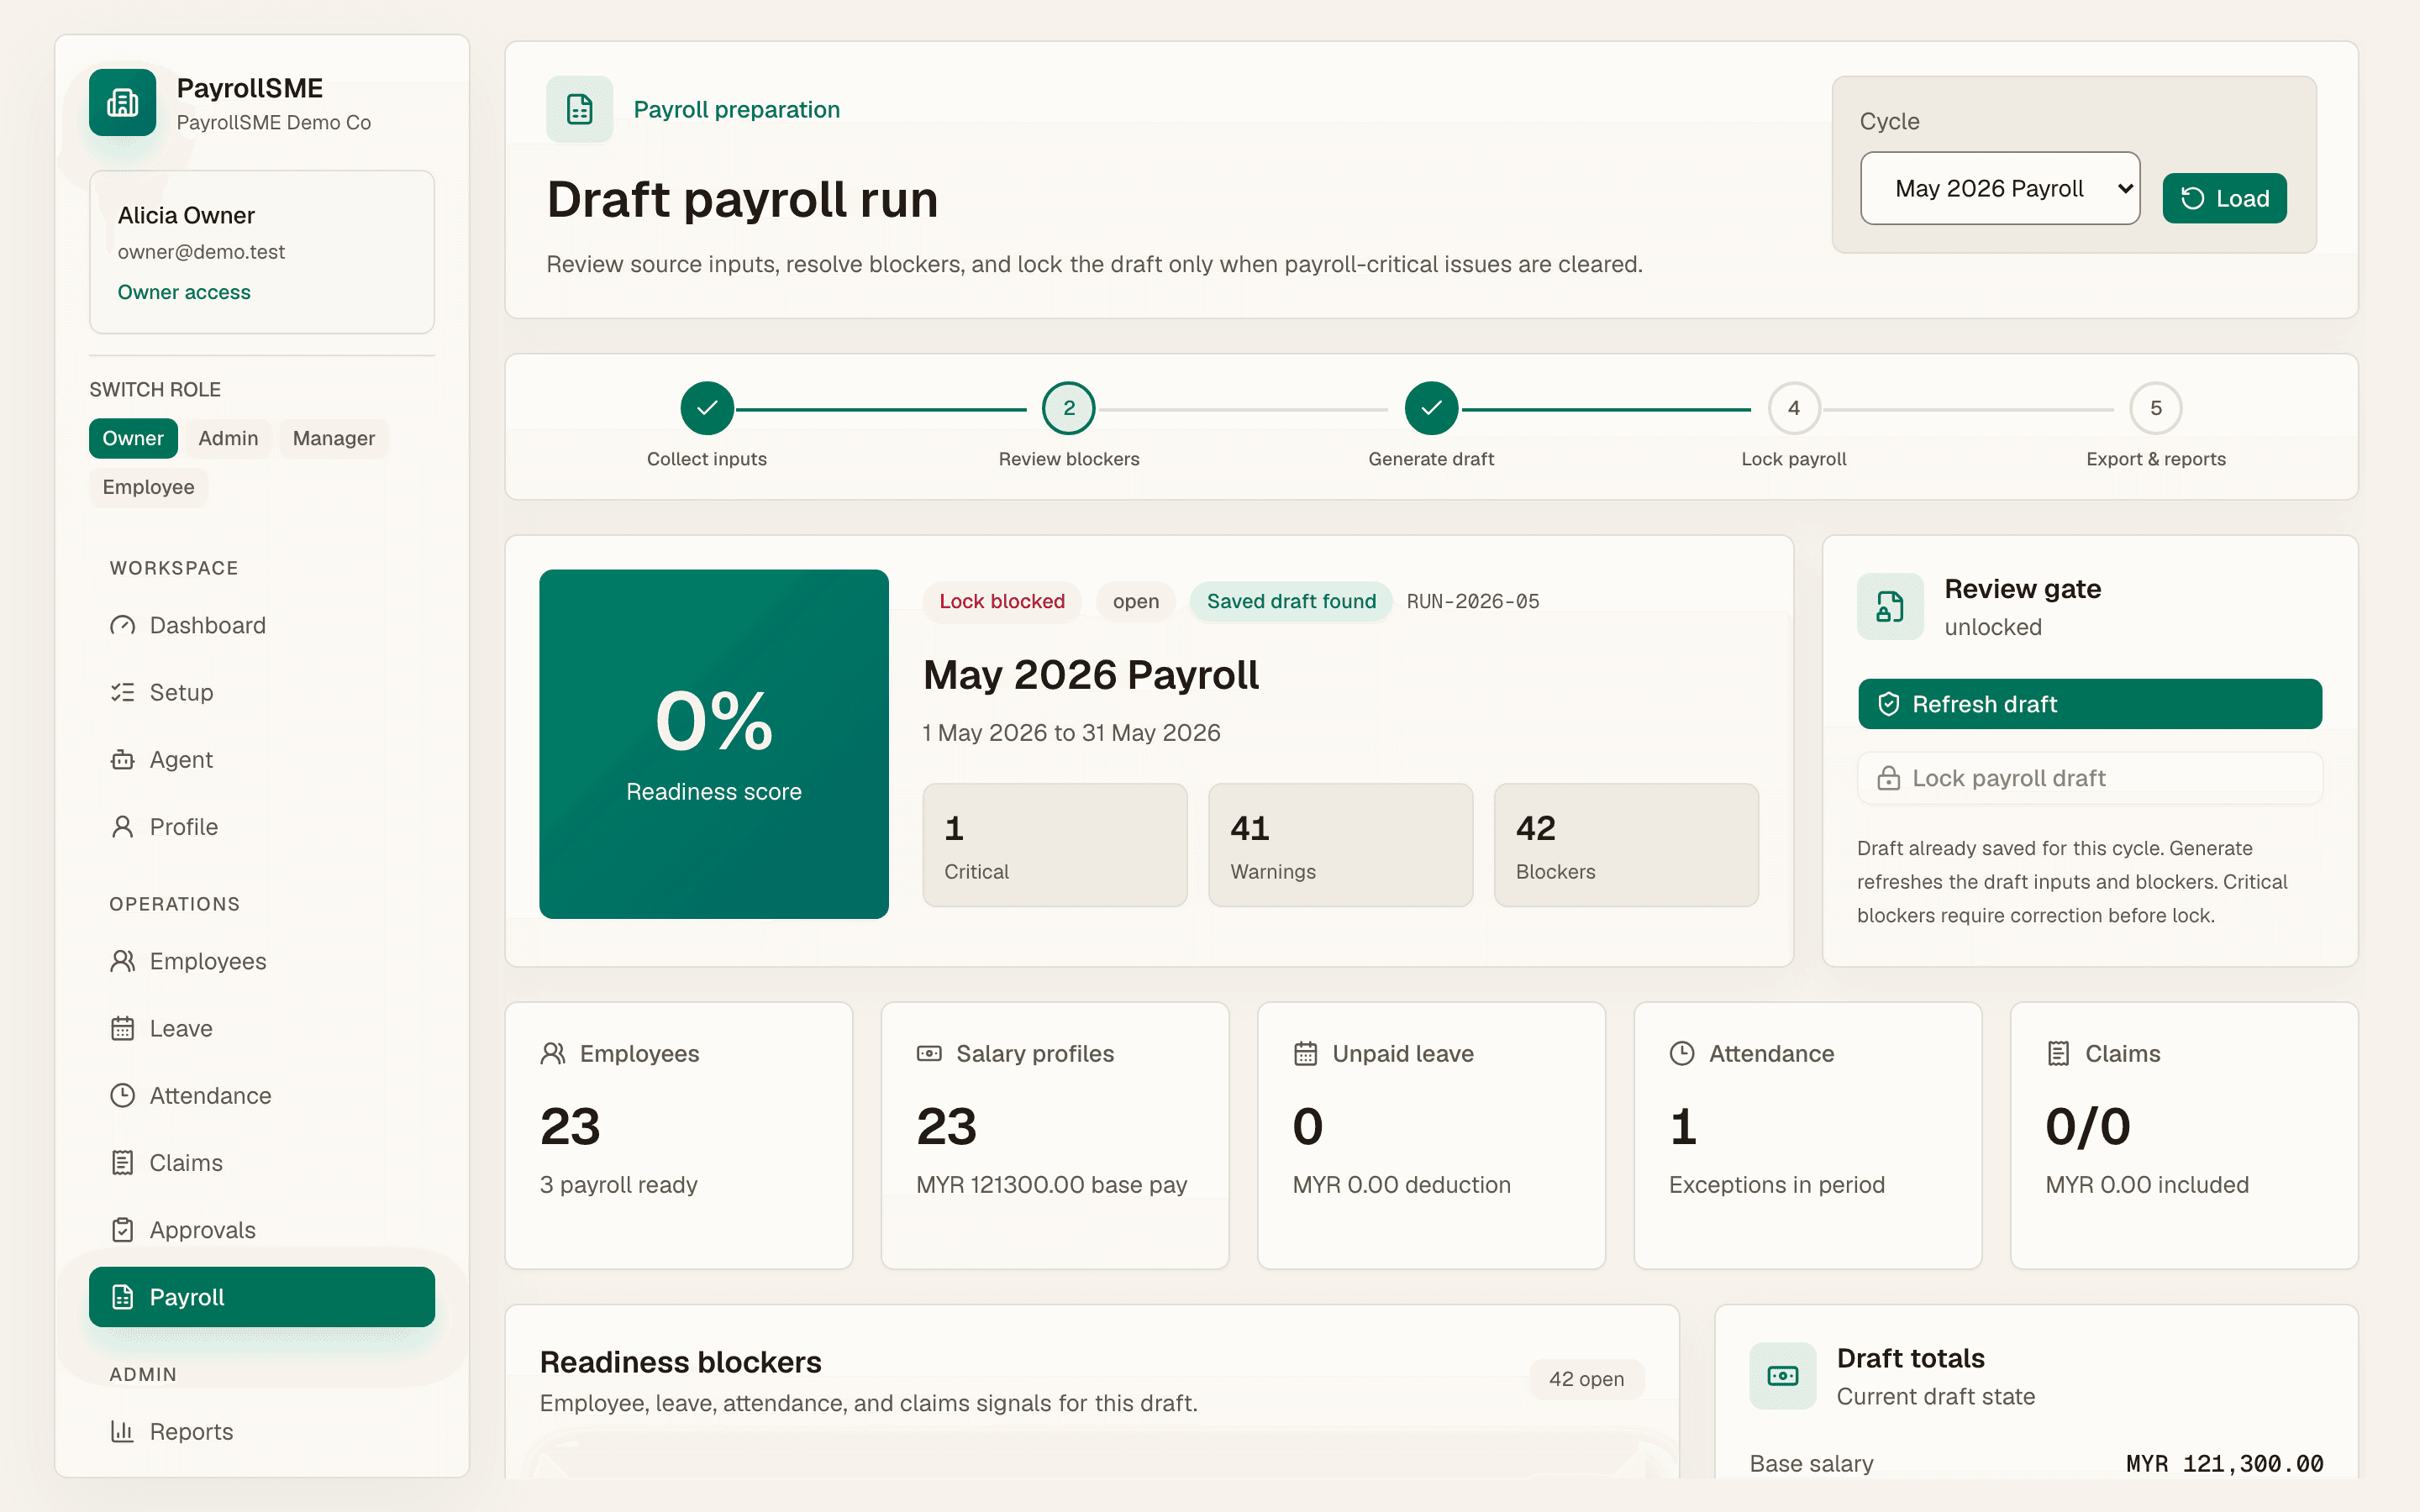
Screen: /payroll · Goal: prepare the payroll run, review blockers, and lock when critical blockers are clear.
- Open Payroll from the sidebar.
- Choose the payroll cycle and select Load if you changed the cycle.
- Review input sources: employees, salary profiles, unpaid leave, attendance, and claims.
- Review readiness blockers and lock rules. Critical blockers must be cleared before lock.
- Select Generate draft or Refresh draft.
- When the draft is saved and the lock gate is clear, select Lock payroll draft.
Acceptance check
- The draft is saved for the selected cycle.
- Lock payroll draft is enabled only after a draft exists and critical blockers are clear.
- The final state shows the payroll draft as locked.
Troubleshooting readiness blockers
| Blocker | What it usually means | Where to fix it |
|---|---|---|
| No employee records | The workspace has no staff records yet. | /employees/new |
| Employee payroll gaps | Salary, bank, EPF, SOCSO, tax, or required employee basics are missing. | /employees |
| Pending approvals | Leave, claims, attendance corrections, or staff changes still need a decision. | /approvals |
| Claim blocked | The claim is missing approval, receipt, or reimbursement-ready status. | /claims and /approvals |
| Approval policies not configured | The five workflow controls have not been saved for this workspace. | /settings#policies |
| Two-factor authentication is off | The owner account does not have 2FA enabled yet. | /settings#security |
| Attendance issues | Imported attendance has payroll-impacting exceptions. | /attendance |
| No payroll cycle | The workspace has not saved an open payroll period. | /setup/company |
Final acceptance checklist
- Owner can sign up and create a company workspace.
- Setup page points clearly to the next required action.
- At least one staff record is saved with payroll-ready profile and salary details.
- Leave and claim examples can be submitted and routed to Approvals.
- Approvals can be approved, rejected, or returned for changes through guarded actions.
- Payroll page can generate a draft for the selected cycle.
- Payroll draft can be locked once critical blockers are cleared.
- Dashboard and payroll screens explain missing readiness data honestly for fresh tenants.
The screenshots in this guide were captured from the local PayrollSME demo workspace on 19 August 2026. The exact staff names, row counts, and IDs may differ in production tenants, but the screens and workflow sequence are the expected path.